As part of our epic questing in this era of video game creation, we are required to battle many fiendish processes that require lots of pre-planning, problem solving and general complex noodling. In this post, I am going to talk about one of those processes, specifically getting the visual richness of high polygon count geometry into a game that only supports a very limited polygon count. Don’t be fooled, there is a lot of steps in-between that requires a lot of attention, so if your not feeling like the sharpest tool in the shed, go get a coffee and come back when you feeling like a cognitive ninja.
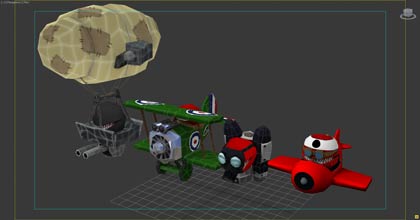
First up a brief intro about the game in question, “Sky Rush” – it features our favourite critter characters from “Arcade Trap”. This game places them in motley collection of flying machines from which they are trying to strike down the player. It is our first game to fully utilize augmented reality (AR) technology.
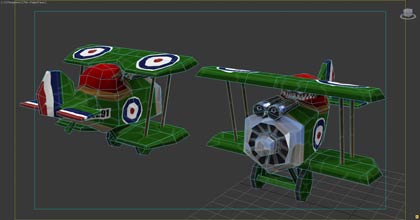
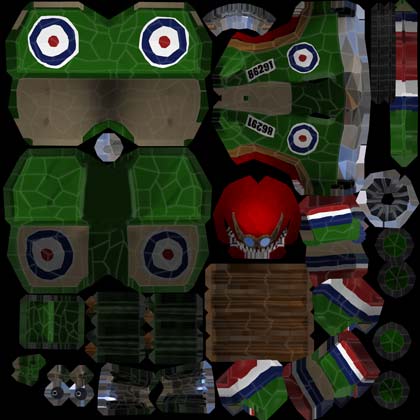
Anyway for this example we’ll be showing the steps in creating the Biplane critter. The first step is modelling the object in 3D, this stage the artist creates a model with as much detail as possible, provided it doesn’t stray from the games aesthetic style. Once happy with the overall look, we do a process called UV Unwrap, which describes (in a very non-technical manner) flattening the 3D polygons from the biplane onto a 2D square texture sheet.

Baking Textures
Because of the specific style of shading on the high-poly mesh and the time limitations, this is is typically done using an automated unwrapping algorithm. In some cases it’s better to manually unwrap the UVs on a Hi-Poly mesh, so particular pieces take up more room on the sheet for better resolution. In the case of the biplane this was done for the parts on the body and wings which have hand painted texture elements (the insignia and lettering).
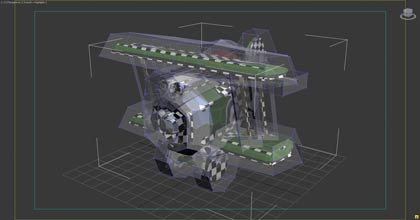
Then we get to the stage called ‘baking’ which renders the final look (with lighting and shadows) of the mesh on a 2D image (texture sheet). Depending on the complexity of the mesh this could require different types of renders to get the final look, in this case we need to “bake” out a render of the overall shading (what we call “beauty”) and additionally the edges of the individual polygons are rendered at varying thickness to get the specific visual effect that is crucial to the visual aesthetic of the game.
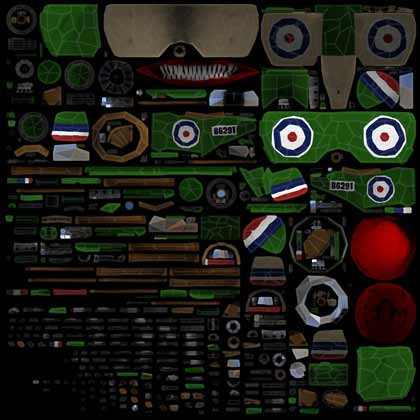
Once all the render passes are completed we composite them together in Photoshop. Then apply it back onto the high poly mesh as a simple flat shaded (i.e. no highlights or shadows). …and that’s your hi-poly done, now we move on to the Low Poly version of the mesh.
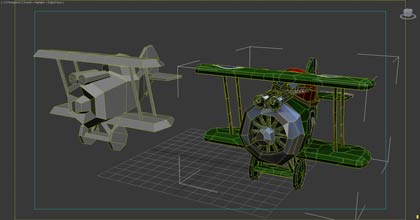
The reason for creating a low-poly version of the model is to reduce the geometry “size”, thereby enabling the game to run faster. When modelling the low poly, always keep in mind to make it as simple as possible – this is where every polygon counts – so always be aware of the amount of polygons (triangles actually if you want to be specific) used and whether it’s necessary to have certain ones… less is more. Once that’s done, take the time to rotate around your mesh in flat shade view, making sure it’s silhouette looks like the desired shape. The final shader that the game uses is an “unlit” shader, so the key low-poly geometry artefacts that we are trying to identify are the biplane’s silhouette, internal overlap (occlusion) and parallax of the geometry. When you’re happy you can start unwrapping it’s UVs.
UV Unwrapping
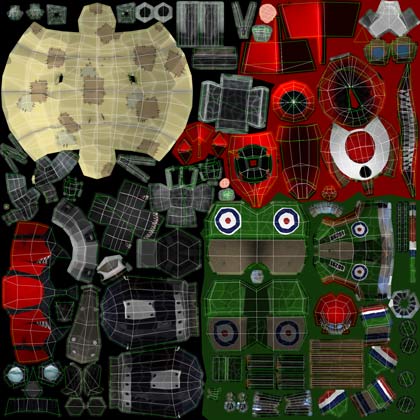
This UV configuration is basically the one that will be used in the game, so it’s best to take your time manually unwrapping and really understand the shape and size of your mesh. Once that’s completed, now comes the easy part of baking the hi-poly mesh onto the low-poly mesh. Firstly you need create a “cage” that projects out from the low-poly geometry, when it hits the high-poly geometry surface it samples the surface colour information and then transfers that back to the corresponding point on the low-poly texture.
After that the texture is typical translated to a new “texture atlas” which basically is a collection of other low poly textures combined into a single texture sheet. This is done so the game performs better using a single texture across multiple objects, rather than a texture per object. This is either by simply scaling the UV data (the simpler alternative) or by creating a second UV channel that is common to all the objects that are going to use the single atlas (the more efficient for the game).
Final texture
And finally your (low-poly) mesh is ready to be used in game. Enjoy!