Folks visiting the AWS office often take note of the sign on the front door loudly declaring “Warning! Imitation weapons stored within – enter at own risk” – well the reason for this, aside from the obvious deterrent to door-to-door salespeople, is that it is relatively common to find weapons strewn about the desks – some of which look strikingly real – for sci-fi weapons that is – until you pick them up and realise they are made of plastic. The latest batch of these imitation weapons is a selection of customised Nerf guns that not only look a bit more vicious than their bright orange counterparts, but pack a significantly harder punch.
Although, relatively speaking, these were simple (…meaning rough and ready) paint/customisation treatments, I have been asked enough how I did them that I though I should share a few of the key steps to get to the end result.
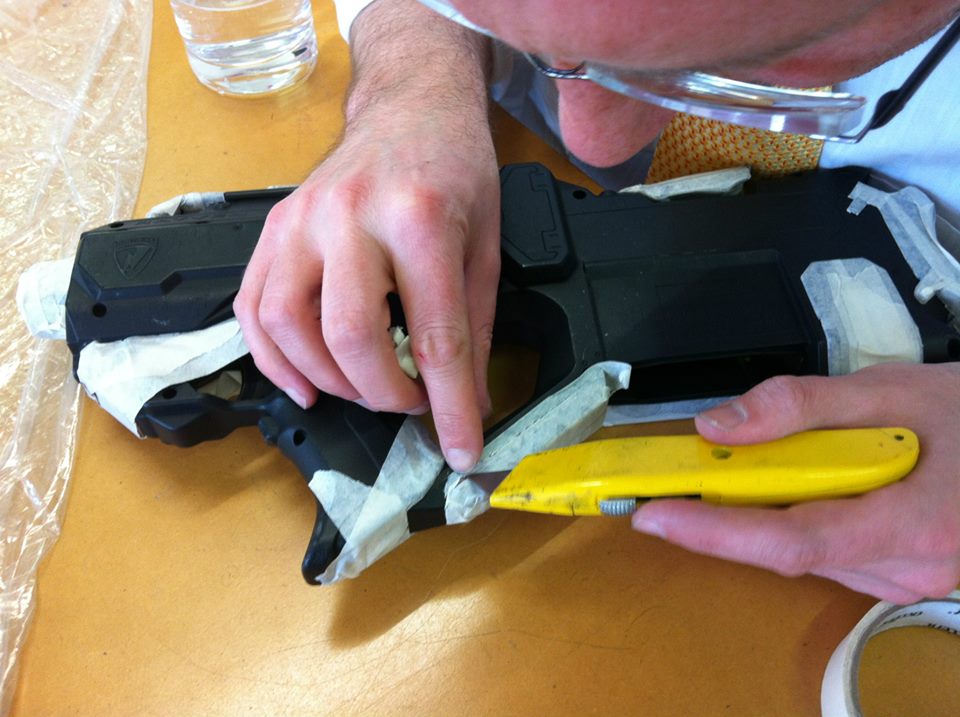
Modification (and de-branding)
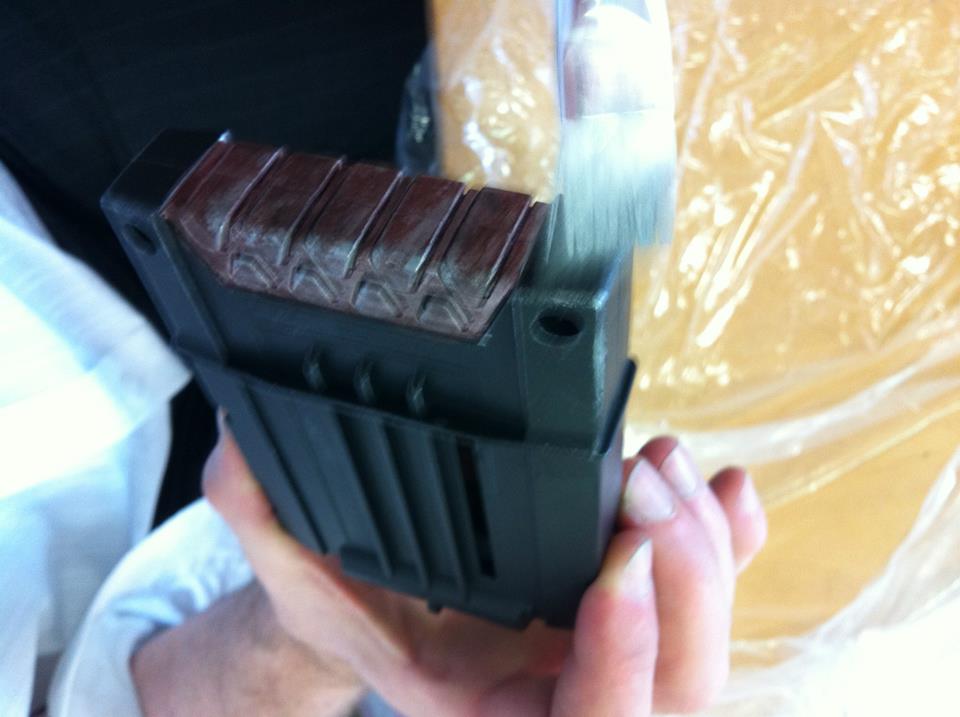
As I didn’t want the guns to have predominate Nerf branding, the first stage was sanding off the various logos and type that was embossed into the plastic of the gun. In addition, I removed a some of the “greeble” that was formed into the plastic – a felt that a lot of this detail would look out-of-place on a real weapon – and also increase the overall time of the paint job, as these parts would require specific attention to make look believable. Similarly a few of the Nerf adaptor parts were sawn with a hack saw, and sanded smooth.
Undercoat
A good paint job starts with a good undercoat. The undercoat for the weapons was a matte black. The undercoat was apply as three spray coats. The trick for getting a good (and durable) undercoat is to makes sure the successive coats are applied at the right time – either just as the paint of the previous coat is started to dry or after it has completely dried (and volatiles have evaporated). At this point the black Nerf guns suddenly start showing their potential as good looking imitation weapons – no wonder Hasbro is require to make these things brightly coloured!
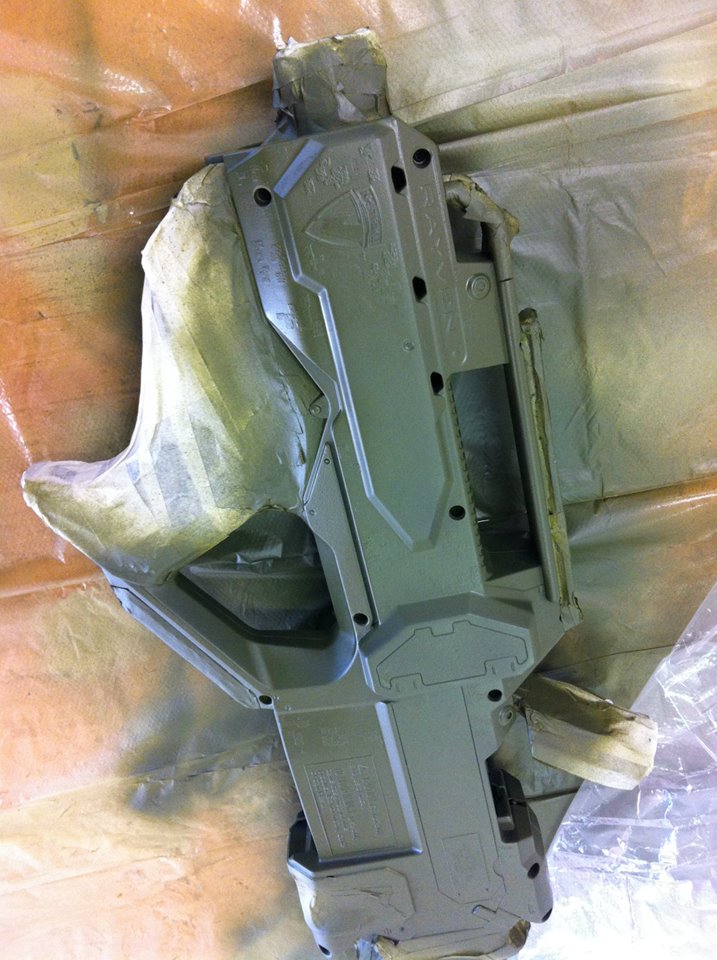
Base / Primary Coats
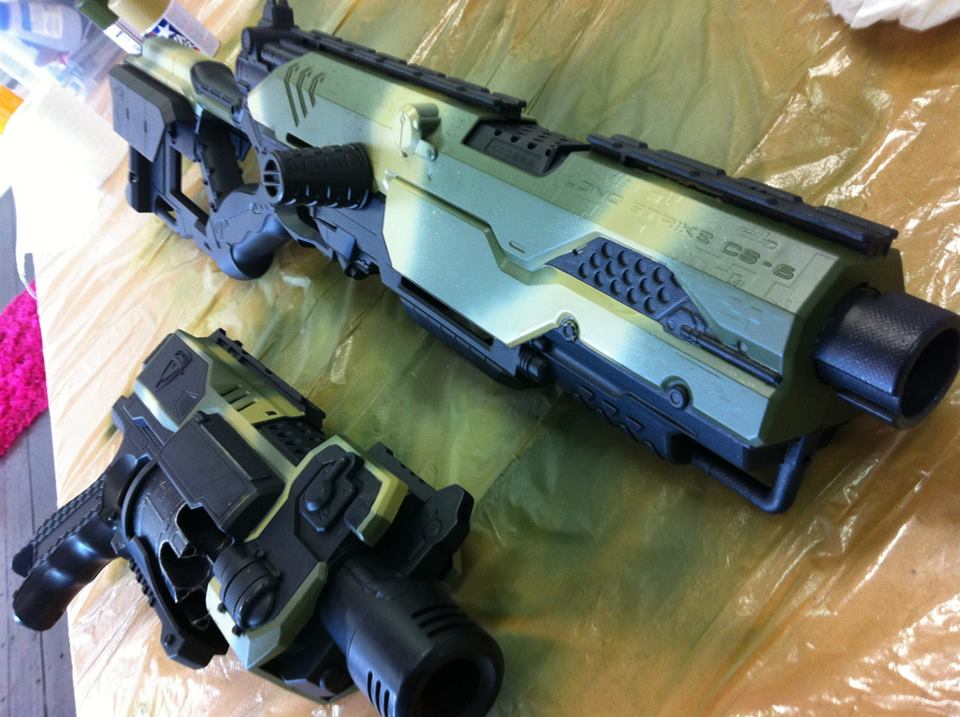
As the style that I was going for was a hyper-real style similar to the general aesthetic of Warhammer 40K, I decided a simple green camo would be ideal. Firstly I selected which parts of the weapon were going to be the green camo ceramic carbide (Hells Yeah!) part and which were going to be other materials. I then masked around these areas using masking tape, paying particular attention to the edge to prevent paint bleeding under the masking. Once I had masked the edge around the areas I was going to spray, I covered the non painting parts of the gun with scrap paper to prevent accidental spraying during the various coats that I was about to do. Once again I did about three coats, keep note of the right time to apply the subsequent coats.
I also wanted a few parts to have a brighter metal finish, so I similar masked and sprayed these parts with a metallic silver. After the base spray of these silver area was completed they look overly bright and fake, but this will be tempered by dirtying these areas in the next stage.
Washes
A wash is a thinned coat of paint (typically applied with a brush) to give the impression of dirt and gunk build-up in the crevices and depressions of the objects, and to give an irregularness to the base coat colours. An important consideration with washes is that you want ensure that you know whether you want to use an oil wash (for painting over acrylics) or water-based wash (for painting over oil/enamels) – if you use they wrong type you can smear the underlying colours – particular if you are using oil based paint (typical for spray enamels). However this smearing effect can sometime be used to an interesting effects sometime – like in the case of the corroded reddish area on the SMG Nerf gun). The amount of wash to apply varies depending on the effect you are after. A general black wash will always elevated the realism of a prop, particular if you are going for a grittier result – but make wipe excess wash off larger flat areas, as it will probably just look out of place once it dries.
Scratching
This stage is one that really elevates the realism of a prop to make it look worn and “real”. This stage involves painting on a few select edge and parts to give the impression that the weapon’s paintwork has been scratched to reveal the underlying undercoats and materials. For these weapons this was a two stage process. Firstly a larger matte black scratch mark was painted. Once this dried, a second silver metallic paint mark was applied, giving the impression that the scratch has revealed the metal under the paint – although it is in fact adding more paint, this process gives the impression that paint has actually been scratched way. Both of these coat should be done with a brush not loaded with a lot of paint, as you want them to not completely cover the underlying layer – this gives the effect a subtlety so it doesn’t jump out as a paint job.

Dry brushing
Dry brushing is the process of loading a brush with paint and then wiping most of the paint off on a paper towel or rag. The trick with dry brushing is to take it slowly – the effect might not be apparent with the first few brush strokes, but it will more effective as you work the surface further. Another trick is choosing the coarseness/flexiblity of the brush you use for dry brushing. A soft brush loaded with less paint will (if applied as lots of light coats) give you the impression of a smooth but worn surface. Using a coarse brush loaded with more paint (and fewer brush strokes) will give you the impression of a more roughly worn surface.
Work between soft and hard strokes 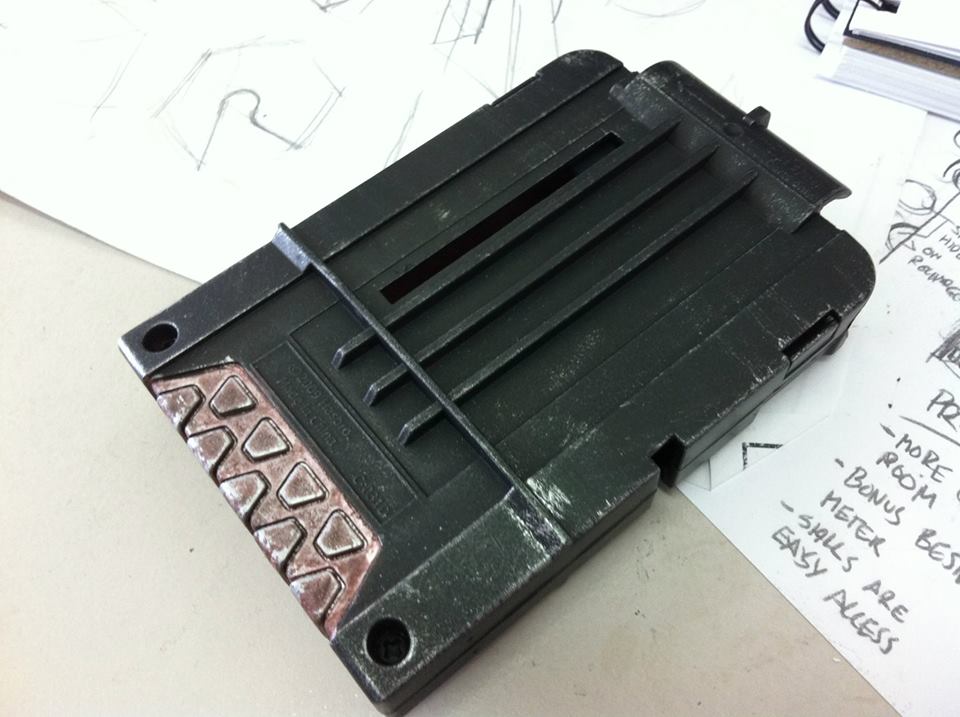
Worn down
Varnishing
This stage allows you to create a protective seal over the paint job, but also to add an additional material differniation between matte and glossy materials. The first coats are a more general matte varnish. One these are fully dried, I then mask around areas that I wanted to be have glossy finishes (polished hard plastic, greasy metal parts), I then spray on thick coats of high gloss varnish.
Completion
The last step in the customisation is the addition of high voltage batteries imported from Hong Kong – the kind of batteries that would fry normal electronics – but with the voltage limiters removed from the Nerf gun motors, they go like mad (and make a ridiculous amount of noise too – so stealth attacks aren’t an option).
… and now it’s time for general office foam dart mayhem!
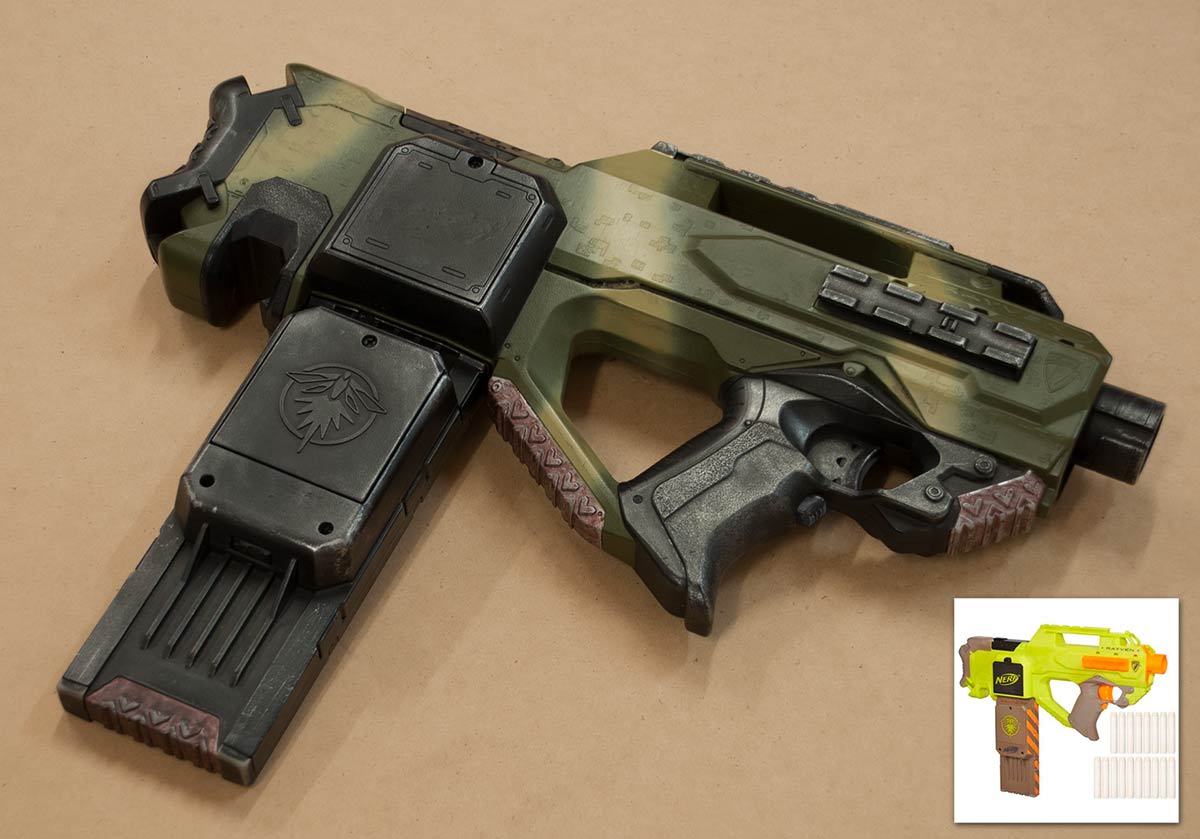
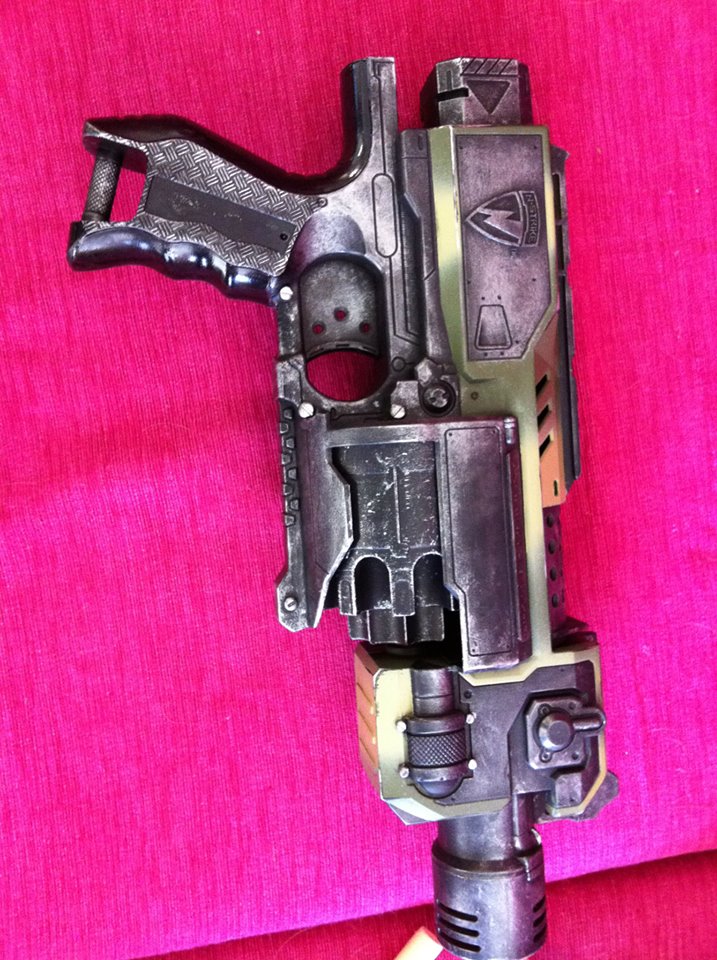
The finished SMG (and the original Nerf look) 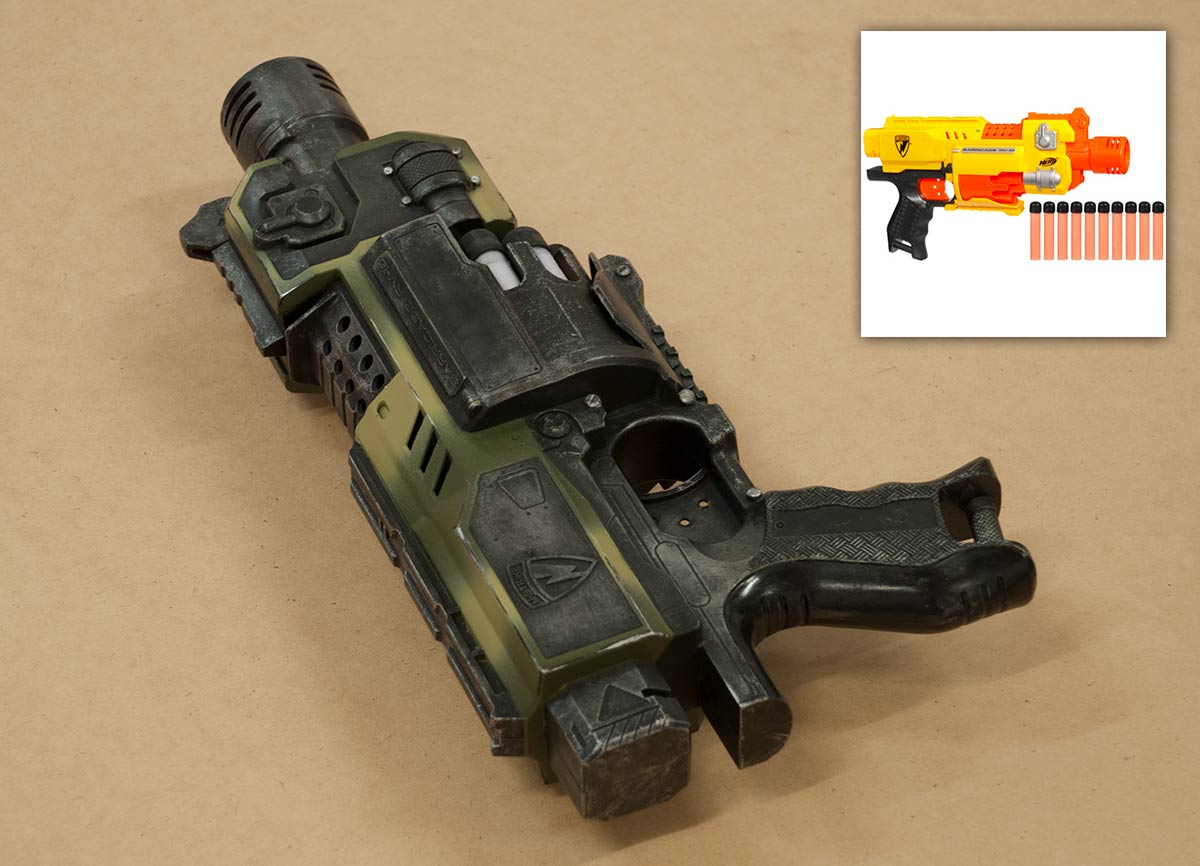
The finished Pistol (and the original Nerf look) 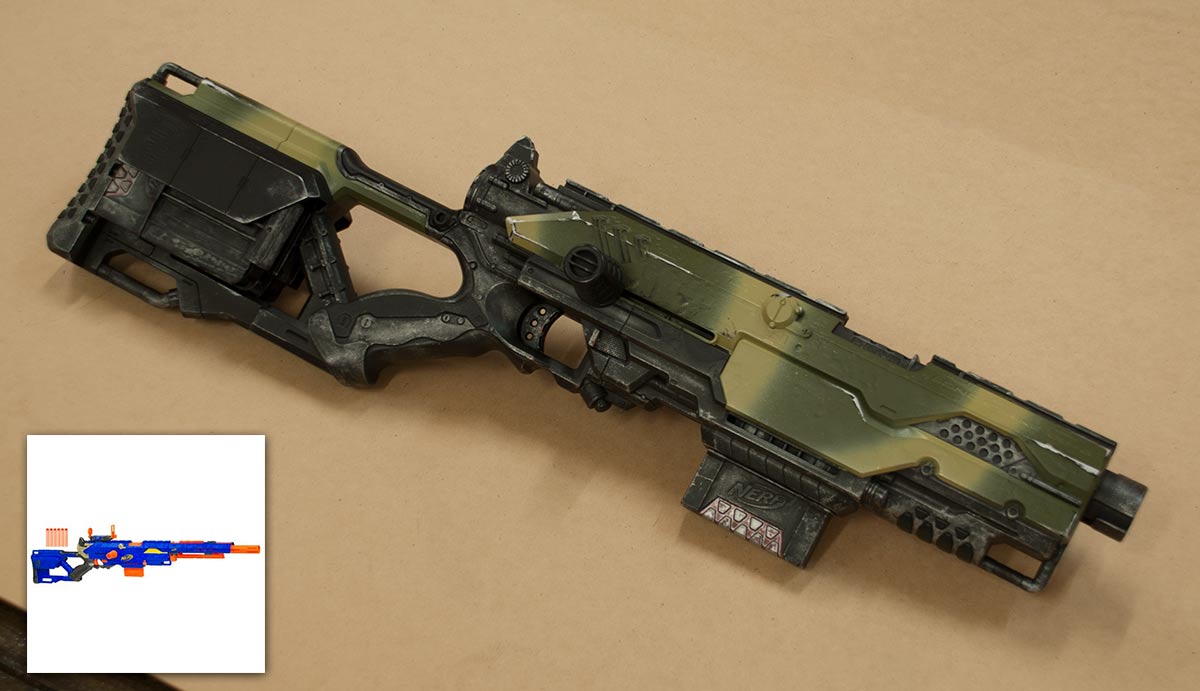
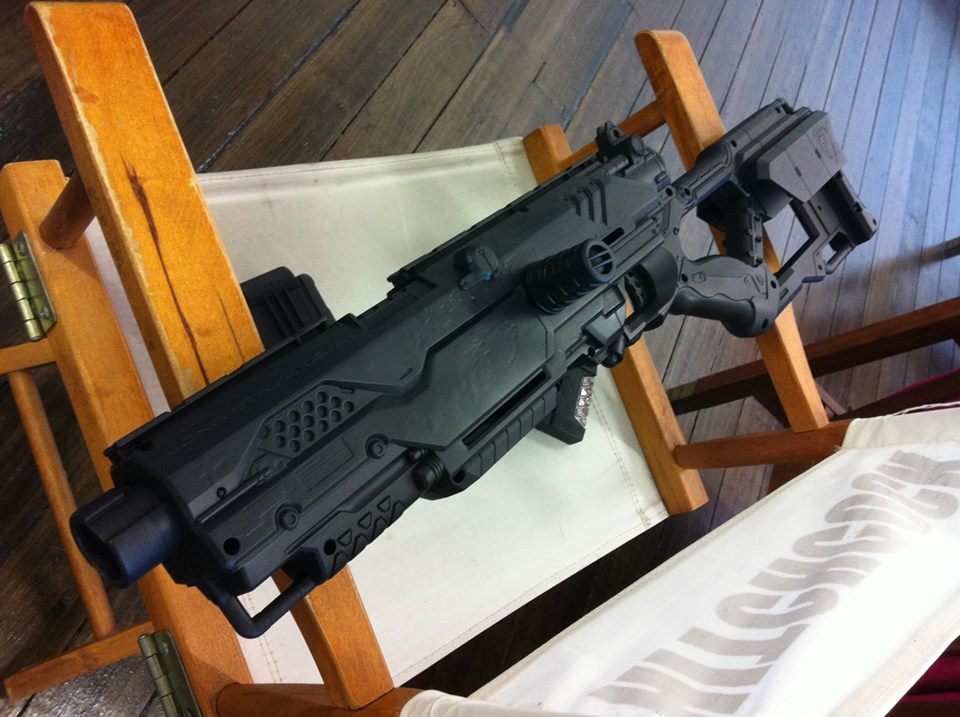
The finished Rifle (and the original Nerf look)
I hope this relatively simple overview will give you an insight into the process.
For further replica and paint inspiration, make sure you check out the amazing work from Volpin Props, steinschneider.com, and of course Weta.
Would love to see your own paint jobs and mods – so comment away or send through links.